My little guy is going to be a pirate for Halloween this year. I wanted to create a real pirate-looking shirt for him. While wandering through JoAnn's looking or inspiration and ideas on what to do, I found these eyelets.. and figured I would learn how to do it and share with all of you!
You can use eyelets in projects as purely decorative {like they do on jeans where the seams come together} or for function, like on a corset.
Eyelets are sold in the "notions" section of the craft store with all of the Velcro, elastic, and pins. While you are there pick up a disappearing ink fabric marker - usually in the quilting supplies section. You will also need a small hammer and small, sharp scissors.
Eyelets come in several different sizes, so find the one that fits your project and make sure you buy the eyelet kit because it will come with the anvil.
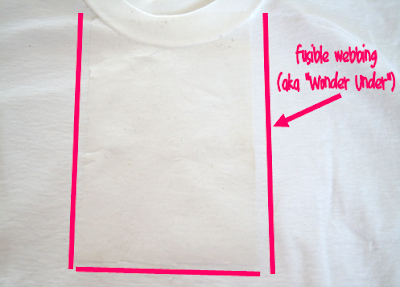
I put my eyelets on a white t-shirt that I already had but since the knit fabric of the t-shirt is thin, it needed some reinforcing. I used Wonder Under (a fusible fabric interfacing) to give it some strength. Just follow the directions on the package and be sure to completely cover the area where you will be placing the eyelets. Be sure to iron it onto the WRONG SIDE of the fabric.
If you are making a pirate shirt like I am, cut the collar off the shirt.
Use a measuring tape or a ruler to mark how far down you want to your eyelets to extend. I placed dot at the top and one at the bottom. Since you are using disappearing ink it doesn't matter that you have these dots.
Now it's time to figure out where your eyelets will go. I equally spaced mine going vertical from my top dot to my bottom dot. Then gradually made them closer together horizontally so that it created a slight "V".
Grab your scissors. Fold the fabric around the first dot so that it is on the crease of your fold. With your scissors make a small snip on that dot. Your snip will look like a "V". Then cut the flap of your "V" off so that you end up with a very small triangle shaped hole.
{Be sure to practice on a scrap piece of fabric first. If your hole is too big your eyelet won't stay in place.}
Take your eyelet and push it through your triangle hole from front to back so that the flat part is on the front of your fabric. You want the fabric to be snug around the base of the eyelet.
Your kit comes with all of the eyelets, plus 2 pieces to the anvil. The smaller piece is the base. It has a raised bubble for you to place the hole of the eyelet on top of. This keeps your hole round as you hammer. The longer piece you place on top of the eyelet - like a sandwich with your fabric and eyelet in the middle. Then with your hammer you gently tap the top so that it bends the back of the eyelet down around your fabric.
Make sure that your eyelet backing bends all the way down. You don't want any sharp edges, especially if it is going to be touching skin like mine will be.
Repeat for the entire side.
Then do the other side. I had to adjust the placement of my bottom 2 eyelets to allow for a tiny space between them. Again, with the disappearing ink marker you don't have to worry about those purple dots. They will disappear.
Then I took my scissors and cut a straight line right down the center of my "V". The interfacing helps the fabric to keep it's shape so it doesn't just flop around because of the weight of the eyelets.
Then I threaded my cording through like a shoelace, tied a knot in both ends so that it doesn't come out, and singed the open edges with a lighter to keep them from fraying.
And there have it! An easy pirate shirt.
What do you want to put eyelets on?!


thanks for sharing wonderful lesson:)
ReplyDeletelove to place eye lit on my kids shirt!